# Build the API
# Initialization
In order to create a bare bone minimap api project, start a terminal and run the following command, assuming .net 6 is installed:
dotnet new web -n minimal-api
cd minimal-api
After the command is executed a new folder named minimal-api is created. To open the code:
cd minimal-api
and run the command
code .
In the Visual Studio Code instance you'll see that a Program.cs file is available with the following content:
var builder = WebApplication.CreateBuilder(args);
var app = builder.Build();

app.MapGet("/", () => "Hello World!");

app.Run();
To run the program, all that is needed is to run the following command in the terminal window, of the same folder (CTRL + `):
dotnet watch run
The program will be built, started and everytime you change something in a file it will recompile and run again. The output in the terminal should look similat to this one:
Building...
warn: Microsoft.AspNetCore.Server.Kestrel.Core.KestrelServer[5]
      The ASP.NET Core developer certificate is in an invalid state. To fix this issue, run the following commands 'dotnet dev-certs https --clean' and 'dotnet dev-certs https' to remove all existing ASP.NET Core development certificates and create a new untrusted developer certificate. On macOS or Windows, use 'dotnet dev-certs https --trust' to trust the new certificate.
info: Microsoft.Hosting.Lifetime[14]
      Now listening on: https://localhost:7013
info: Microsoft.Hosting.Lifetime[14]
      Now listening on: http://localhost:5201
info: Microsoft.Hosting.Lifetime[0]
      Application started. Press Ctrl+C to shut down.
info: Microsoft.Hosting.Lifetime[0]
      Hosting environment: Development
info: Microsoft.Hosting.Lifetime[0]
The default browser will be opened and Hello World! will be shown.
If the browser didn't open by default, open a browser and navigate to the urls specified when starting the app you'll see:
Hello World!
Congratulation!
Now you have the first minimal api created, built, started and opened in the browser.
# The Todo
Our api will work with Todos! A Todo is an item we want to accomplish and it contains and Id integer, a Title string and a IsCompleted boolean.
At the begining of the file Program.cs, the first line in the file shoud be this one:
List<Todo> todos = new();
This will contain the list of all of out todos. We will add, remove and update todos from this list.
At the end of the Program.cs add the following class:
public class Todo{
    public int Id { get; set; }
    public string Title { get; set; }
    public bool IsCompleted { get; set; }
}
# Endpoints
Next step is to create the Todos CRUD apis!
As you know, CRUD stands for Create, Read, Update and Delete. We will add them in a different order.
# Read
Open the Project.cs file and replace the following line:
app.MapGet("/", () => "Hello World!");
with the following ones:
app.MapGet("/api/todos/", () => todos);
Your api will rebuild and start again showing in the browser just an empy array like this:
[]
This means your application is running and returning an empty list of Todos!
We have the Read of all todos, but how about a single Todos?
In order to achieve this we'll add the following endpoint imediately after the previous one:
app.MapGet("/api/todos/{id:int}", (int id) => {
    var todo = todos.FirstOrDefault(x=>x.Id == id);
    return todo is Todo? Results.Ok(todo) : Results.NotFound();
});
The above endpoint will respond to calls like this: https://localhost:[your_port]/api/todos/1 where 1 is the Id of an existing Todo. If there is no Todo with that id in the todos list we have, then, a HTTP Error 404(not found) will be returned.
# Create
Creating a Todo is done by POSTing a Todo body to the /api/todos endpoint. We will do this by adding the following code above the app.Run();:
app.MapPost("/api/todos/", (Todo todo) => {
    if (todos == null) return Results.BadRequest();
    todo.Id = todos.Count + 1;
    todos.Add(todo);
    return Results.Created($"/{todo.Id}", todo);
});
What we have above is the code that will check if the Todo is received and if is not, then, a Bad Request response (HTTP 400) will be returned to the caller. If is present then it will received and Id and will be added to the todos list. After addition, a response (HTTP 201 ) is returned to the caller and also the URL where that new entry is availbale.
Don't worry, testing this from the browser will be done later when the OpenAPI UI will be added. You could also try the api using curl (opens new window), but you'll have to install it too if is not installed alredy.
# Update
For our use case, we'll just replace an existing Todo using the code below. It needs to be added just above the line app.Run();:
app.MapPut("/api/todos/{id:int}", (int id, Todo todo) => {
    if (todos == null) return Results.BadRequest();
    var idx = todos.FindIndex(x=>x.Id == id);
    todos[idx] = todo;
    return Results.Accepted();
});
The lines above will return a BadRequest if the todo is not present in the body of the request. In case the todo is present then, it will find the item with the same id inside the list of todos and replace it with the one received.
# Delete
Deleting a Todo is another endpoint that we have to add. We'll add the following code just above the app.Run();:
app.MapDelete("/api/todos/{id:int}", (int id) => {
    todos =  todos.Where(x=>x.Id != id).ToList();
    return Results.Ok();
});
We delete the item by replacing the todos with all the items that have the Id different the id received.
# Open API
The OpenAPI Specification (OAS) defines a standard, language-agnostic interface to RESTful APIs which allows both humans and computers to discover the capabilities of the service without access to source code, documentation.
Adding Open Api is done via the Swashbuckle.AspNetCore (opens new window) nuget package.
Open the terminal to the root of your project and execute the following line:
dotnet add package Swashbuckle.AspNetCore
Once added, open the Program.cs and just above this line var app = builder.Build(); add the following lines:
builder.Services.AddEndpointsApiExplorer();
builder.Services.AddSwaggerGen(c =>
{
    c.SwaggerDoc("v1", new() { Title = builder.Environment.ApplicationName, Version = "v1" });
});
In the same file but just after the line var app = builder.Build(); add the lines below to:
    app.UseSwagger();
    app.UseSwaggerUI(c => c.SwaggerEndpoint("/swagger/v1/swagger.json", $"{builder.Environment.ApplicationName} v1"));
    app.MapGet("/", () => Results.Redirect("/swagger"));
The lines above will add and configure swagger so that the swagger ui will be made available.
The app.Get will redirect the root url of the api to the swagger ui interface. We do this so that we have the Swagger UI available when the site will be started.
In the terminal where the api is running, stop it with CTRL + C and then start it again dotnet watch run and navigate to the following url: http://localhost:[your_port]/swagger.
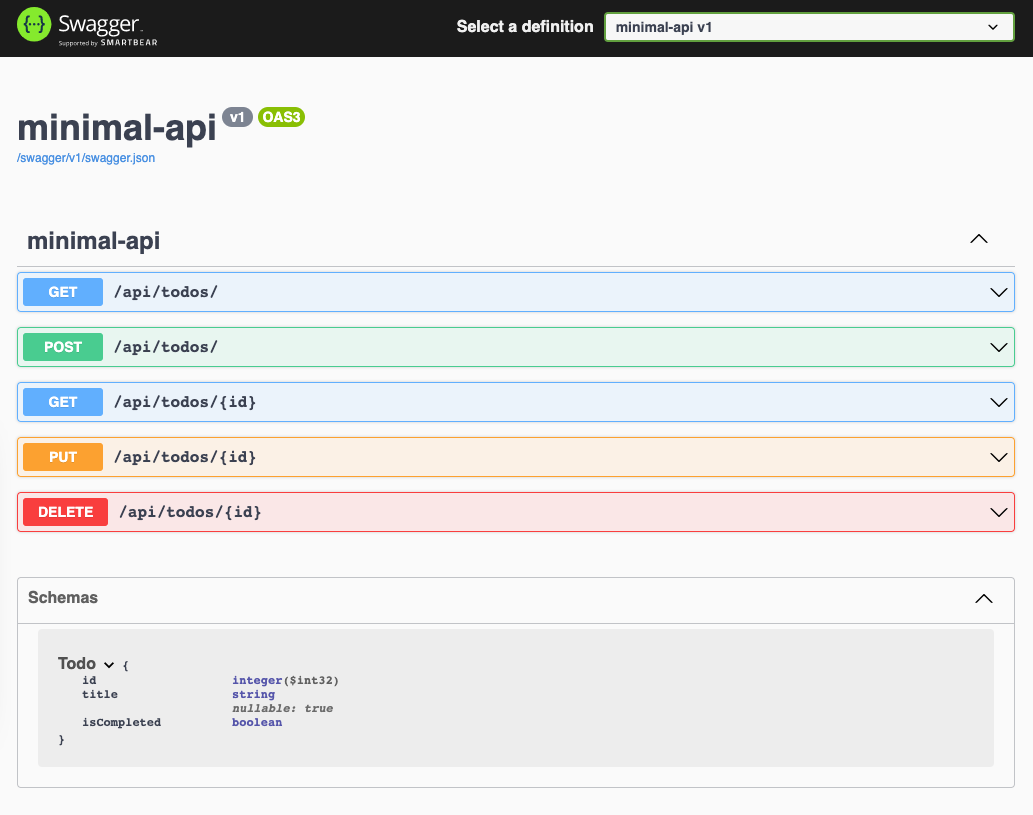
The interface should look something like this:

The SwaggerUI interface, we just added, will let you test the api and make all the calls available from the browser interface.
Play with the endpoints and see how they behave.
# Validation
Validation is required so that the data received by the api is as expected. In case it is not, we have to let the caller know.
For this, we will use the MiniValidation (opens new window) package. To add it to our project we have to run the following command, in the terminal, in the same folder as our Program.cs:
dotnet add package MiniValidation --prerelease
The library uses the System.ComponentModel.DataAnnotations namespace so that all the available validations can be used. A list of them, can be found here: Validations (opens new window)
Open Program.cs and add the following lines, as the first ones, in the Program.cs file:
using System.ComponentModel.DataAnnotations;
using MiniValidation;
For the Todo class, we have to add the Required validation by replacing this line:
public string Title { get; set; }
with this ones:
[Required]
public string Title { get; set; }
Next step is to use the validation inside our api. The validation is quite easy, more or less 1 line for the validation and one line for returning the messages in a HTTP 400 response.
Inside Program.cs replace the following line:
app.MapPost("/api/todos/", (Todo todo) => {
with this ones:
app.MapPost("/api/todos/", (Todo todo) => {
    if (!MiniValidator.TryValidate(todo, out var errors))
        return Results.BadRequest( errors.Keys.SelectMany(x =>
                        errors[x].Select(y => new { Property = x, Error = y }))
        );
The lines above will validate the todo object received from the caller and create a response, a HTTP 400 status code, and include the Property name and the Error for all of the invalid ones.
An invalid response will look something like this, when called form the terminal with curl (download curl (opens new window)):
$ curl -X 'POST'\
  'http://localhost:[your_port]/api/todos/' \
  -H 'accept: */*' \
  -H 'Content-Type: application/json' \
  -d '{
  "id": 0,
  "isCompleted": true
}'
and the response will be:
[
  {
    "property": "Title",
    "error": "The Title field is required."
  }
]
The same test can be done using the swagger interface that is available:
https://localhost:[your_port]/swagger/index.html
# Error handling
Let's add an endpoint that will just throw error as an example.
Before the app.Run() add the following code:
app.MapGet("/api/error", (httpContext) => throw new ApplicationException("Ups, something went wrong!"));
The above lines will throw a new exception every time it is called.
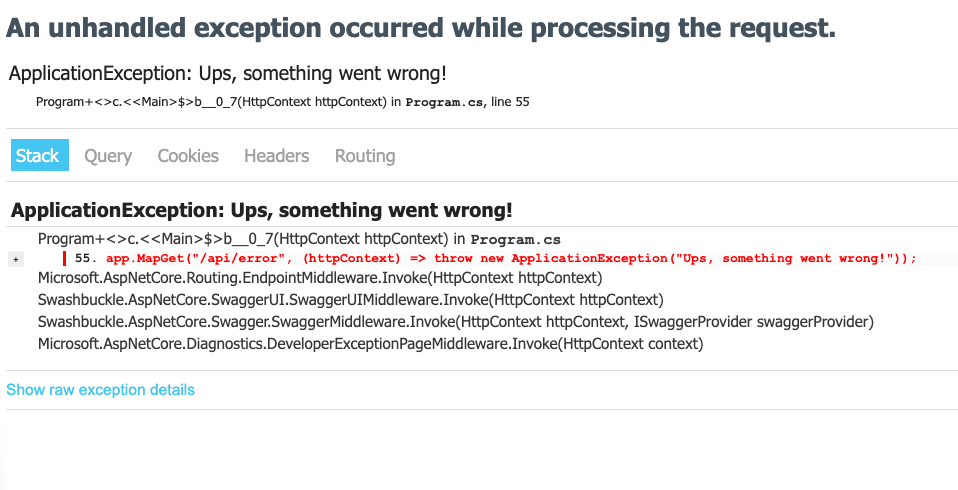
By default, in development mode, when an error occures,a standard page with the error is displayed:

You'll have details about the error and about the request details.
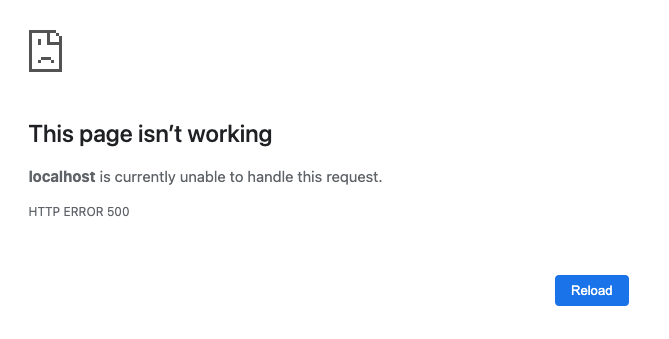
When runnin in production mode, dotnet run --environment PRD, without the error handler, the received message is the following:

When called via curl or postman the response should look like this:
$ http http://localhost:[your_port]/api/error
HTTP/1.1 500 Internal Server Error
Content-Length: 0
Date: Wed, 19 Jan 2022 07:27:16 GMT
Server: Kestrel
Adding the global error handling is done via UseExceptionHandler. Add the following code just after the var app = builder.Build(); inside Program.cs
app.UseExceptionHandler((errorApp)=>{
    //The error will be added automatically to the logs
    errorApp.Run(async(context) =>{
        context.Response.StatusCode =  500;
        context.Response.ContentType = "application/json";
        await context.Response.WriteAsJsonAsync(new{Erorr="Something went wrong!"});
    });
});
Once you add the error handler, the received message will be the expected one as a JSON because we have an api:

# Services
The minimal api offers a default Dependency Injection container and we will use it to register and use dependencies. One of those dependencies will be the TodosService that will take out the logic from the api actions and move them to the service.
First let's delete this line from our code List<Todo> todos = new();. Then create the TodosService class and add it to the end of the Program.cs file.
public class TodosService
{
    private static List<Todo> todos = new();

    public List<Todo> GetAll() => todos;

    internal Todo GetById(int id) => todos.FirstOrDefault(x => x.Id == id);

    public int Create(Todo todo)
    {
        todo.Id = todos.Count + 1;
        todos.Add(todo);
        return todo.Id;
    }

    public void Update(int id, Todo todo)
    {
        todo.Id = id;
        var idx = todos.FindIndex(x => x.Id == id);
        todos[idx] = todo;
    }
    public void Delete(int id) => todos = todos.Where(x => x.Id != id).ToList();
}
The above class contains a static list of todos that will keep all our todos. Then we have the code from the api that deals with todos. All the methods will use the todos list to operate over todos.
In order to make the service available to the api we have to register it. We do this by adding the following line just after this one var builder = WebApplication.CreateBuilder(args);:
builder.Services.AddScoped<TodosService>();
The code above will make the TodosService available as a new instance for every call that arrives to our api.
Now we have to make our api use this new service:
Replace the full method
app.MapGet("/api/todos/" ...
with the new one:
app.MapGet("/api/todos/", (TodosService service) => service.GetAll());
Get all todos will use the todos service to return all the todos.
The TodosService will be injected in the method by the Dependency injection container at runtime so we don't have to worry about it.
Replace the full method
app.MapGet("/api/todos/{id:int}" ...
with the new one:
app.MapGet("/api/todos/{id:int}", (int id, TodosService service) =>
{
    var todo = service.GetById(id);
    return todo is Todo ? Results.Ok(todo) : Results.NotFound();
});
The get by id will return just the todo with the requested id or a HTTP 404 if not found, using the todos service.
Replace the full method
app.MapPost("/api/todos/" ...
with the new one:
app.MapPost("/api/todos/", (Todo todo, TodosService service) =>
{
    if (!MiniValidator.TryValidate(todo, out var errors))
        return Results.BadRequest(errors.Keys.SelectMany(x =>
                       errors[x].Select(y => new { Property = x, Error = y }))
        );

    var id = service.Create(todo);
    return Results.Created($"/{id}", todo);
});
Now, the lines above will move the logic for creating a new todo from the action to the service method. The validation remains the same as before.
Replace the full method
app.MapPut("/api/todos/{id:int}" ...
with the new one:
app.MapPut("/api/todos/{id:int}", (int id, Todo todo, TodosService service) =>
{
    service.Update(id, todo);
    return Results.Ok();
});
As for the other methods, the update logic was moved to todo service update method.
Replace the full method
app.MapDelete("/api/todos/{id:int}" ...
with the new one:
app.MapDelete("/api/todos/{id:int}", (int id, TodosService service) =>
{
    service.Delete(id);
    return Results.Ok();
});
And with the delete action, that has the logic moved to the todo service, we are done with updating the code to use the service. We delegated all the logic to the TodosService that is injected by the DI container at runtime.
TIP
The full code, and more, is available on github here (opens new window)
Next we will be looking into deploying the api.